I like taking the easy way. (My coworker says that it's because I'm a lazy American... but as soon as I put down my Taco Bell and Cheetos, I gave him a piece of my mind.) So, I like using self adhesive things whenever possible. Adhesive batting comes in very handy for these circles because the bond is sturdy but low enough tack that it's adjustable if a mistake is made, not that I make mistakes (more than once every five minutes, anyway). I cut templates out of poster board and use them to trace the shapes onto the batting and then cut out the circles.

I cut the fabric to where it's at least 3/4" bigger than the batting, so there will be enough surface area for the adhesive to grab onto when I fold it over.
Then flip the fabric and template over and use a very hot iron to activate the adhesive and as much pressure as I think the table can stand to make it stick to the fabric. The only thing to be careful of here is that if the bottom of the batting also heats up, it will stick to your ironing pad. It's not a disaster if that happens because the tack is low enough that it will peel off, but you don't want do that too many times and have excessive residue left on your ironing pad; that could cause issues on future projects.

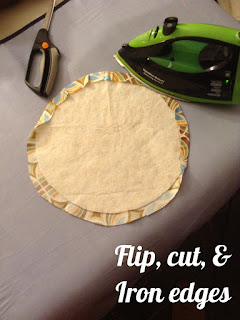
Flip the circle back over and cut around the edges, I leave a good deal of fabric so I can iron without touching the batting - gummy irons are a bad thing - and so there is enough fabric to be grabbed by the adhesive. The cuts don't have to be even or pretty, they will be buried and never ever seen again, so don't sweat perfection here. Speaking of sweating, I burn my fingers during this part - at least once for every four circles... but you are all probably more graceful than I am.
This works well for larger circles and they hold in place until it's time to applique them to the quilt top. But, smaller circles take one extra step.
I always have to tack the fabric to smaller circles before I iron them; otherwise I end up with malformed hexi-octi- or whatever - gons. These stitches can be as long or short as you need them to be, because as soon as the edges are ironed down, you rip them out anyway, so the longer the better.
The really bad thing though, is doing all this work and then questioning your color choices. I laid these out in the configuration I wanted and was less than enthused, but it's growing on me. I'll show the finished quilt in a February round up post at the end of the month.


No comments:
Post a Comment